
Creating your first workflow
Build an automated workflow with the visual editor, test it, and turn it on.
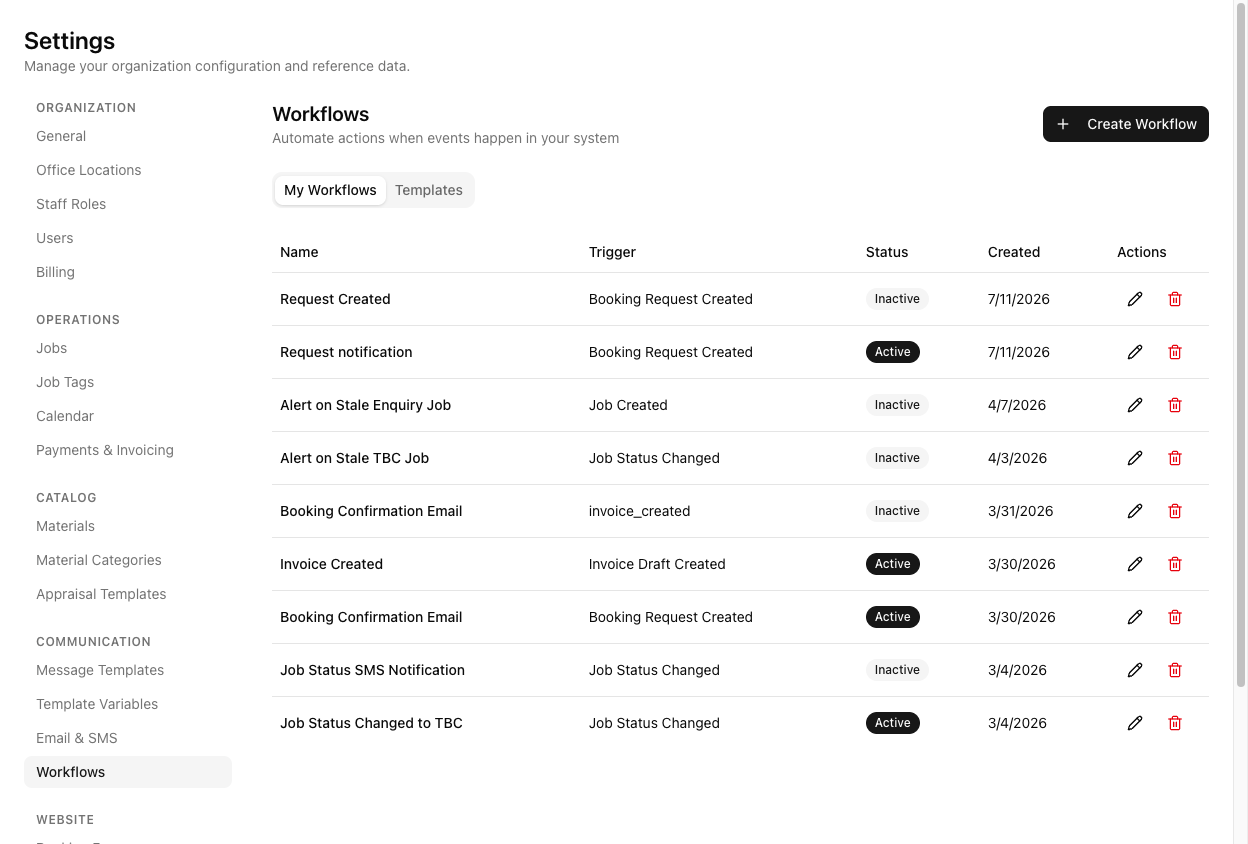
A workflow watches for something happening — a job is created, a status changes, an invoice goes out — and then does something about it, without anyone clicking. They live under Settings > Workflows.
Create it
Click Create Workflow. The dialog asks for a Name and a Trigger Event.
The trigger is required here, before the editor opens — you cannot decide later. Choosing it up front is what determines which data your conditions can read further down, so it is a real decision, not a formality.
Click Create & Edit.
You land on the canvas with your trigger already placed. The toolbar shows Back, the workflow name, Trigger: your trigger, and two buttons — Test and Logs.
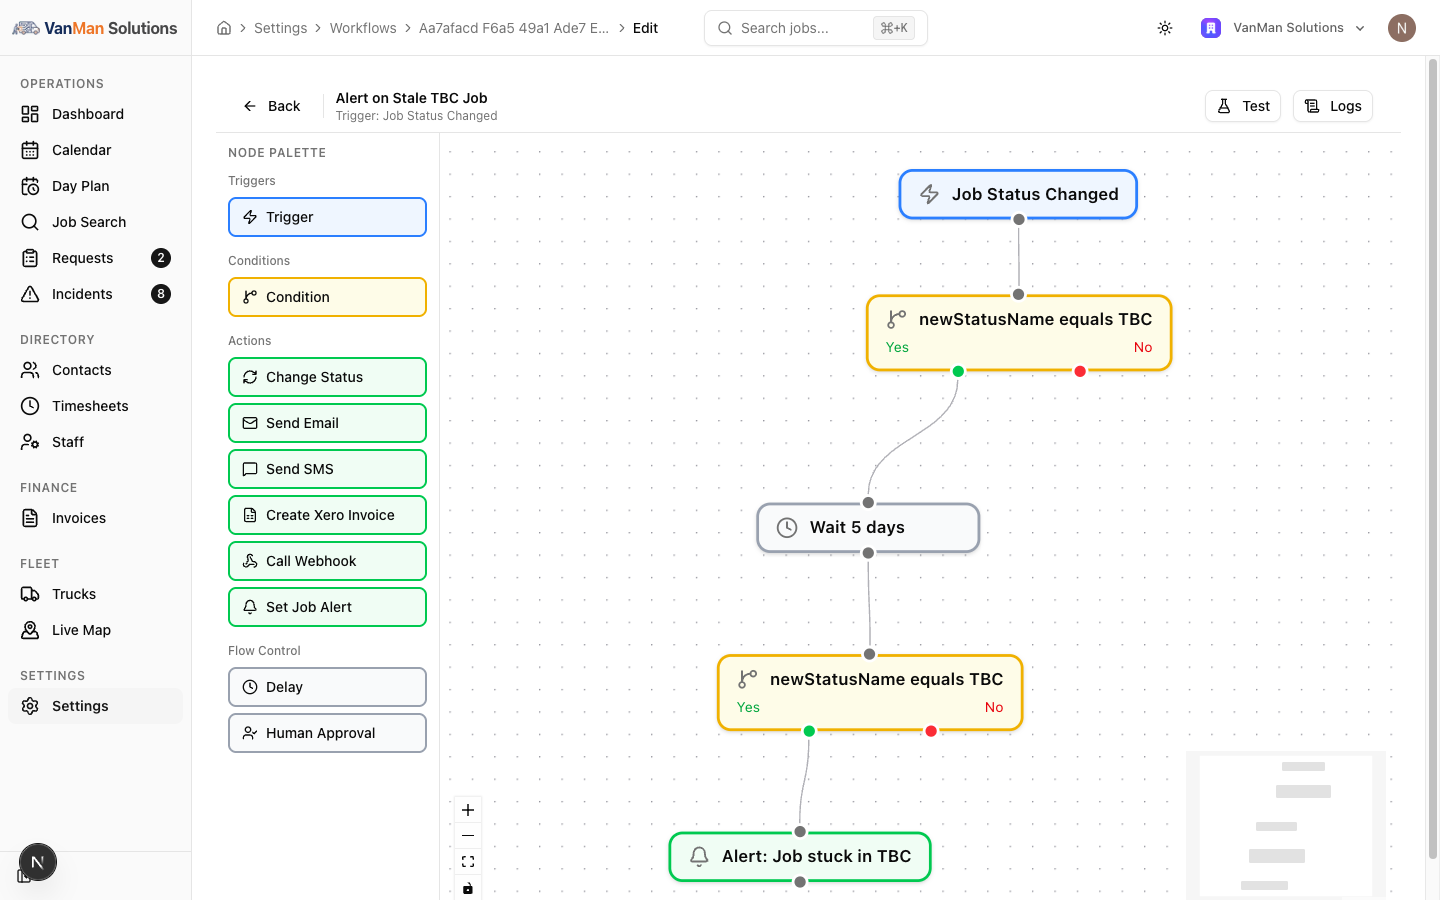
Drag nodes from the Node Palette onto the canvas, then drag from one node's handle to another to connect them. Click a node to open its configuration panel on the right.
Only one trigger is allowed per workflow — dropping a second one is rejected. Nothing can connect into a trigger, and you cannot connect a node to itself.
Click the workflow name in the toolbar to rename it inline.
There isn't one.
The editor autosaves about two seconds after each change. The indicator in the toolbar tells you where you are: Saving..., then Saved, or Save failed. Wait for Saved before you close the tab — and if you see Save failed, your last change did not stick.
Click Test. The Test Workflow dialog runs the workflow without sending anything real. You can give it a Job ID or Booking ID to run against actual data, or leave it blank to use sample data.
Test runs appear in your logs with a Dry Run status — which is why unexpected entries turn up there later.
Click Back. Find your workflow in the table and click its Status badge to flip it from Inactive to Active.
New workflows are created Inactive, and there is no Active switch in the editor. Building a workflow does not turn it on. The clickable Status badge on the list page is the only place activation happens — this is the step people miss and then wonder why nothing fired.
Canvas handling
Delete a node by selecting it and pressing Backspace or Delete. There is a minimap and zoom controls in the corner for larger workflows.
Building and editing workflows needs the workflow edit permission. Operators cannot open the editor at all — they can see the list and read logs, but Create Workflow, Use Template, and the pencil are hidden from them. Admins and Office Admins have full access.
Tutorial: text the customer when a job is booked
Build the whole thing, end to end.
Click Create Workflow. Name it Booking confirmation SMS. Set Trigger Event to Job Status Changed — the event you care about is the job becoming Booked, not the job being created. Click Create & Edit.
Drag Condition from the palette onto the canvas. Connect the trigger's bottom handle to the condition's top handle.
Click the condition to open Condition Configuration. Set the field to newStatusName, the operator to equals, and the value to Booked.
Without this, the workflow fires on every status change — including Cancelled. The condition is what makes it mean "booked".
Drag Send SMS onto the canvas. Connect it to the condition's Yes handle (the green one on the left). The No handle is red, on the right — leave it unconnected; that branch simply ends.
Click the Send SMS node. Set the recipient to Job Contact Phone. You now choose between Write Message and Use Template — it defaults to writing inline.
Use the inline body for now:
Hi {{CustomerFirstName}}, your move on {{JobStartDate}} is confirmed. Any questions, call {{CompanyPhone}}. — {{BusinessName}}
Insert those with the Insert Variable buttons rather than typing them. They are double-braced PascalCase; single braces would be texted to the customer literally.
Watch the toolbar indicator settle on Saved. There is nothing to click.
Click Test. Paste in the Job ID of a real booked job. Run it. Nothing is sent — this is a dry run — but you get to see the message body resolved against genuine data. Check the customer's name actually appeared.
Click Back. Find Booking confirmation SMS in the list — it says Inactive. Click the badge. It flips to Active.
Only now is it live.
Move a real job to Booked. Open the workflow, click Logs, and look for a Completed execution. Expand it to see each step. If nothing is there, the workflow never triggered — check the Status badge first.
Do not build from scratch if a template already fits. Settings > Workflows has a Templates tab with six ready-made workflows — including a booking confirmation and a job status SMS. Starting from one and editing it is faster and less error-prone.