
Setting up your costs catalog
Build your cost categories and costs — the priced items that feed job costing, quotes and invoices.
Your catalog is the priced list of everything you charge for — crew rates, travel, packing materials. It feeds job costing, quotes, and invoices. It lives across two settings pages, not one:
- Cost Categories (Settings > Cost Categories) — the groupings.
- Costs (Settings > Costs) — the individual priced items.
Build the categories first, then the costs that live in them.
These pages used to be called Materials and Material Categories. They are now Costs and Cost Categories, under the Catalog group in Settings — the list was never only packing materials, and calling it costs stops people looking for crew rates somewhere else. Nothing about how it works changed.
Cost Categories
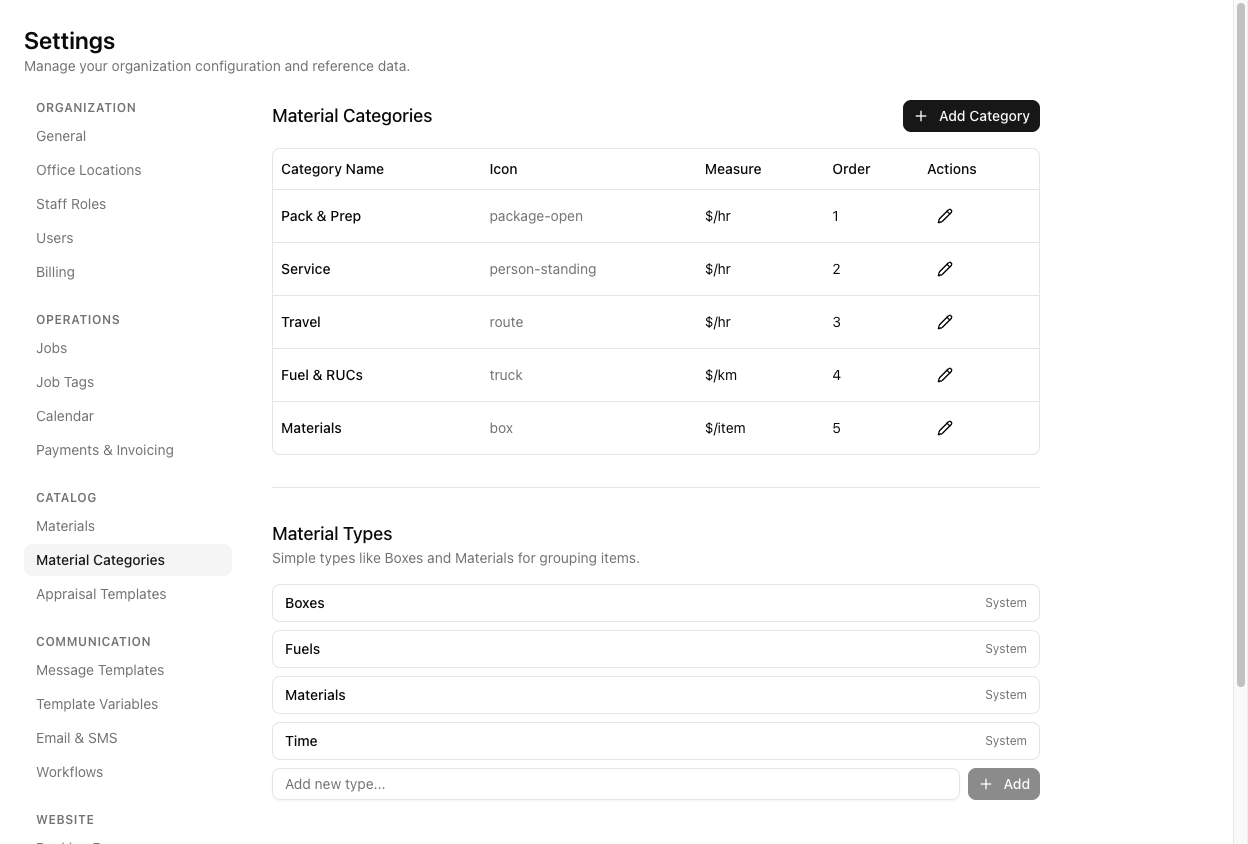
Click Add Category. Each has a Category Name, an icon, an Order, and a Measure Unit.
Measure Unit is one of exactly three: $/hr, $/km, or $/item — and it is locked once the category exists. Choose it deliberately; you cannot change it later without recreating the category. Service is $/hr, travel-distance is $/km, boxes are $/item.
A new account seeds five categories: Pack & Prep, Service, Travel, Fuel & RUCs, and Materials.
Each category also carries an Invoice Account Code for Xero — see connecting Xero.
Costs
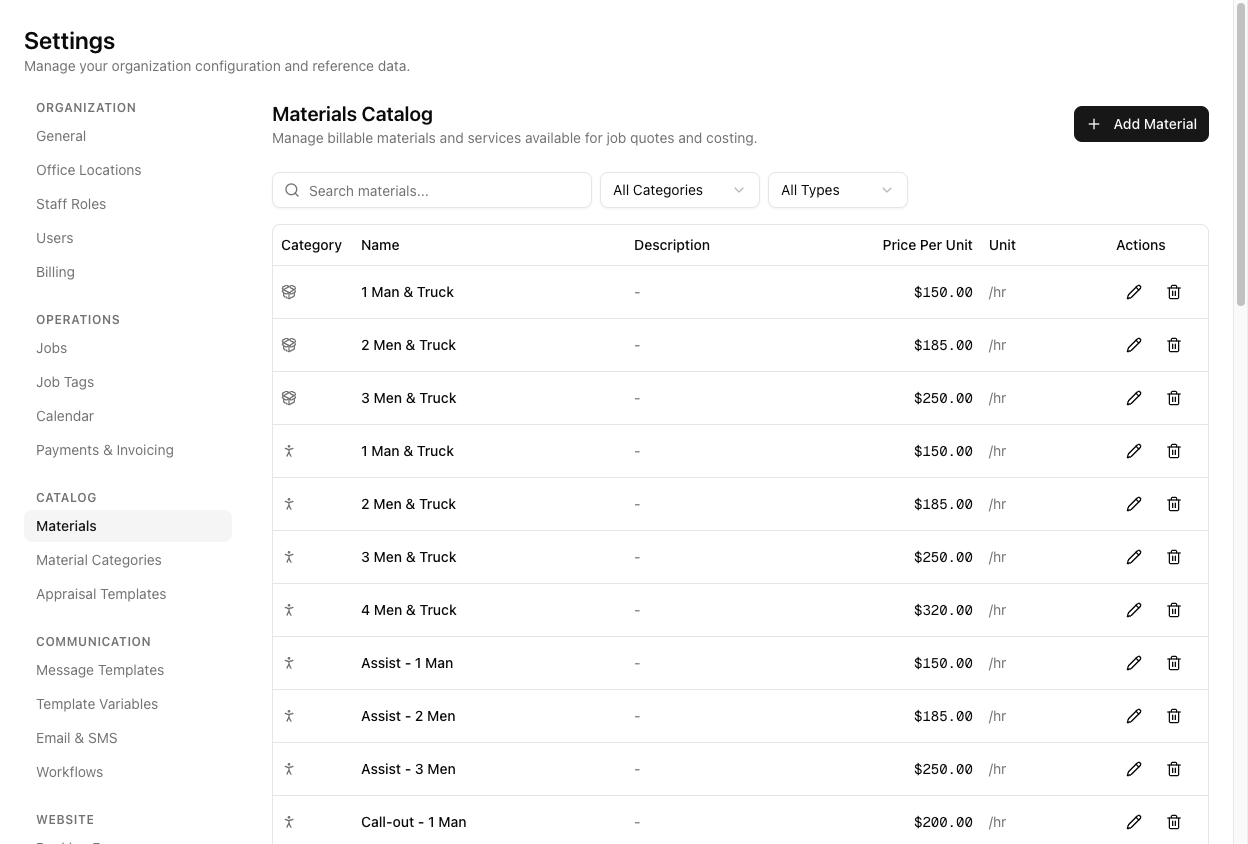
The Costs Catalog is a flat, filterable table — not a set of category folders. Search by name, or filter by All Categories, All Types, and status (Active / Retired / All Statuses). Click Add Cost (one button, top of the page) and fill in:
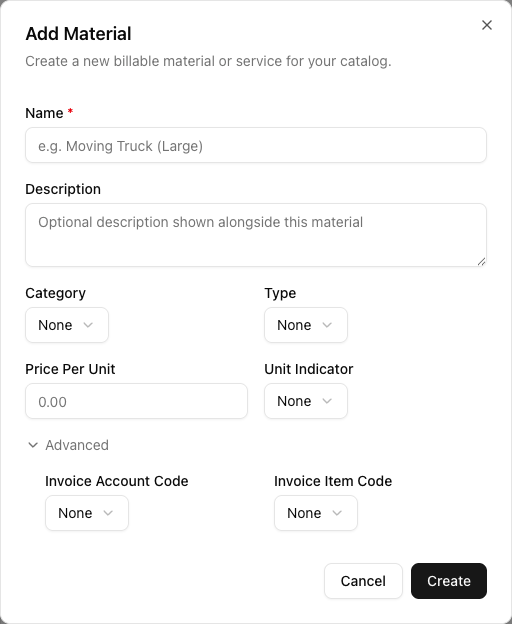
- Name (required)
- Description
- Category
- Type — a separate grouping (Boxes, Fuels, Materials, Time), not the unit
- Price Per Unit
- Unit Indicator — the per-unit label: /hr, /half day, /day, /km, /item, /usage, /cost, /quoted, or /fee
Type and Unit Indicator are different fields. Type is a broad grouping; Unit Indicator is what the price is per. Do not expect "each" or "per hour" as options — the real list is the one above.
Under Advanced sit the Xero Invoice Account Code and Invoice Item Code. Click Create.
Changing a cost's price only affects new jobs. Jobs already costed keep the price they had at the time, so re-pricing your catalog never rewrites history.
Costs in use cannot be deleted — VanMan blocks it if active job lines reference them. Retire them instead: the item stays on the jobs, quotes and bundles it is already on, but stops being selectable on new work, and you can restore it any time. See retiring a cost.
Bundles
A set of costs can be grouped into a bundle and sold at one fixed amount — a packing kit, a travel-and-fuel charge. Bundles are built at Settings > Bundles; see using bundles.
Tutorial: add a packing-materials line
You want to start charging for wardrobe boxes.
Go to Settings > Cost Categories. There is a seeded Materials category with Measure $/item — right for a box. If you needed a new category, you would set its Measure now and be unable to change it later.
Go to Settings > Costs. This is a different page from Cost Categories, and it is a flat table. Click Add Cost — there is one button, not one per category.
Name: Wardrobe box (hire). Category: Materials. Type: Boxes — remember Type is a grouping, separate from the unit.
Price Per Unit: 8.00. Unit Indicator: /item. Now it prices as $8.00 /item on a job, and a quantity of 5 comes to $40.
Expand Advanced and set the Invoice Account Code to your materials sales account. Do it now — a cost with no code is a Xero rejection waiting to happen the first time it appears on an invoice.
Click Create. Open a job's Costs tab, click Add items under Cost items, and add your wardrobe box. It prices correctly and is ready to invoice. Quantities take decimals, so half a pack is 0.5.
If you later raise the price to $9, jobs already costed stay at $8. Only new jobs pick up the new price — you will not accidentally re-bill an old job.